Well, I survived! Emma's 2nd Birthday Party was a huge success! I think I added a little more stress to the process then was necessary, but it all worked out and she had the time of her life!
I set out on this little adventure with the goal of keeping the entire party (for 30+ guests) under $100.
And let me just say...
I came in right at around $95 for everything! And I think that's pretty darn good!!
Some may say I set a precident with this party and I'll have to have huge shindigs from this point on.
Some would ask what's the point seeing as Emma probably won't remember any of it.
I threw this party because Emma didn't have a 1st Birthday bash. And I take great pride in the fact that one day she will look back on these pictures and know that so much love and attention to detail and fun was put on all for her!! Not to mention, when she's older (and has children of her own) she'll really appreciate the thrifty~ness of it all!!
You might be wondering how I pulled it all off for under $100 and I have two words for you.
Dollar Tree.
Now, some stuff did come from Target and Party City, but most of what was used was either made from supplies from DT or bought and used directly from there.
Here's some pics...

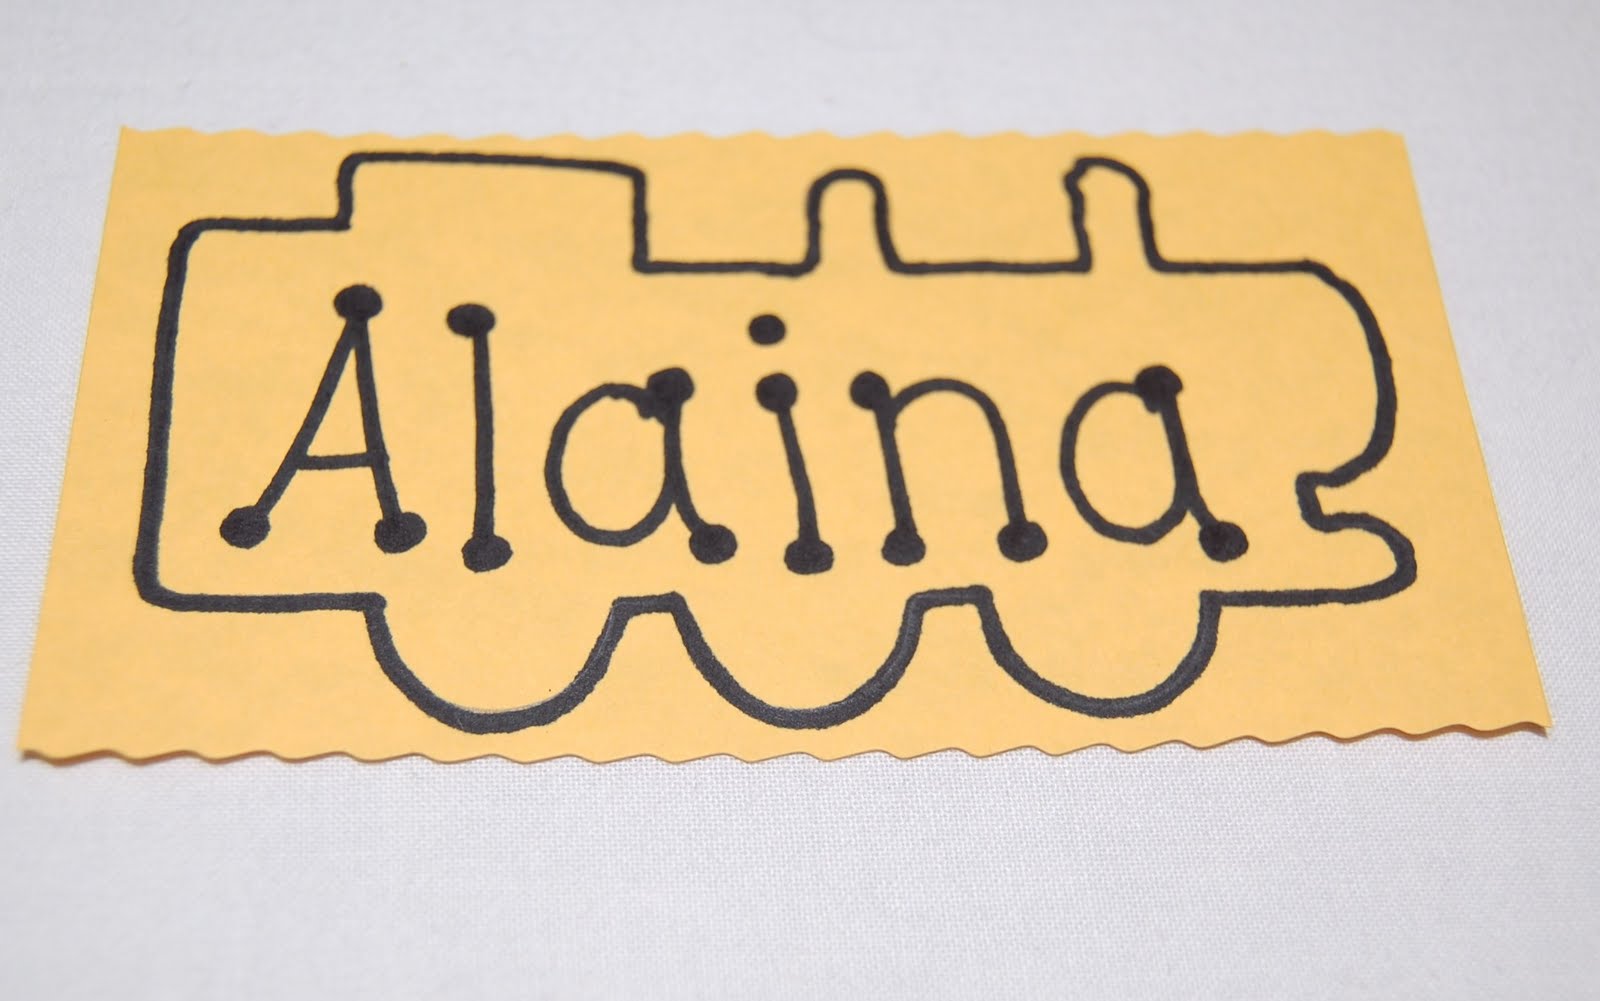
This was Emma's Invitation. And I simply did this on Microsoft Publisher. You don't have to be a PhotoShop Junkie (though that helps, too) to come up with simple projects. I found a personalized invite online that I liked (might I add some were being designed and sold for $12.95 a pop) and I just made my own, using what I found as a foundational idea, but tweaking what I needed here and there. This included scanning in a picture from one of Emma's Thomas the Train books and incorporating it into the invitation. I printed out on photopaper that I found at Ollies for $3 a pack.
Balloons came from Dollar Tree as did the plates, cups and napkins.
Of course the Thomas themed items came from Target and/or Party City.

For the favor bags I gave out Bubbles, fruit snacks and personalized bookmarks to each child.
A tutorial for the bookmark can be found HERE.

We're really fortunate to have a neighborhood park (with a nice shelter) right across the street from our house! This worked out perfectly as we didn't have to reserve it or anything. FREE!!

I did make a sign for the entrance of the park so everyone would know where to go! I got the posterboard from the Dollar Tree and because we were having a Thomas Party, I went with an "Island of Sodor" approach!

While we're on the topic of drawing, I found this idea for Pin the Nose on James HERE. There are so many great resources out there on having DIY birthday parties and the Mom that came up with this game has a whole slew of Thomas Party ideas! Check it out. To draw James, again, I used one of Emma's Thomas books as a guide. I cut out little circles from contruction paper, wrote the kid's names on them and used glue dots to make them stick!

The Dollar Tree had this great little train banner, but I didn't like the middle picture, so I printed out a picture of Thomas and glued him on! To spruce it up and blend colors a little I added blue stars at each corner!

Because this was a kids party, I kept the snacks simple: pretzels, goldfish and animal crackers, water and apple juice. I also printed out coloring sheets from PBS and left them on each table for the kids to color and take home. Party City had the packs of crayons for $0.49 each.

We had Funfetti (box mix) Cupcakes, too! YUM!!

I did not make this cake. WalMart did. But it was a petite one (perfect for the Birthday Girl) and only $5.88. I couldn't resist!

Emma loved it so much she kept giving "Baby Thomas" kisses! =)

Everyone having a good time! More peeps are on the playground!
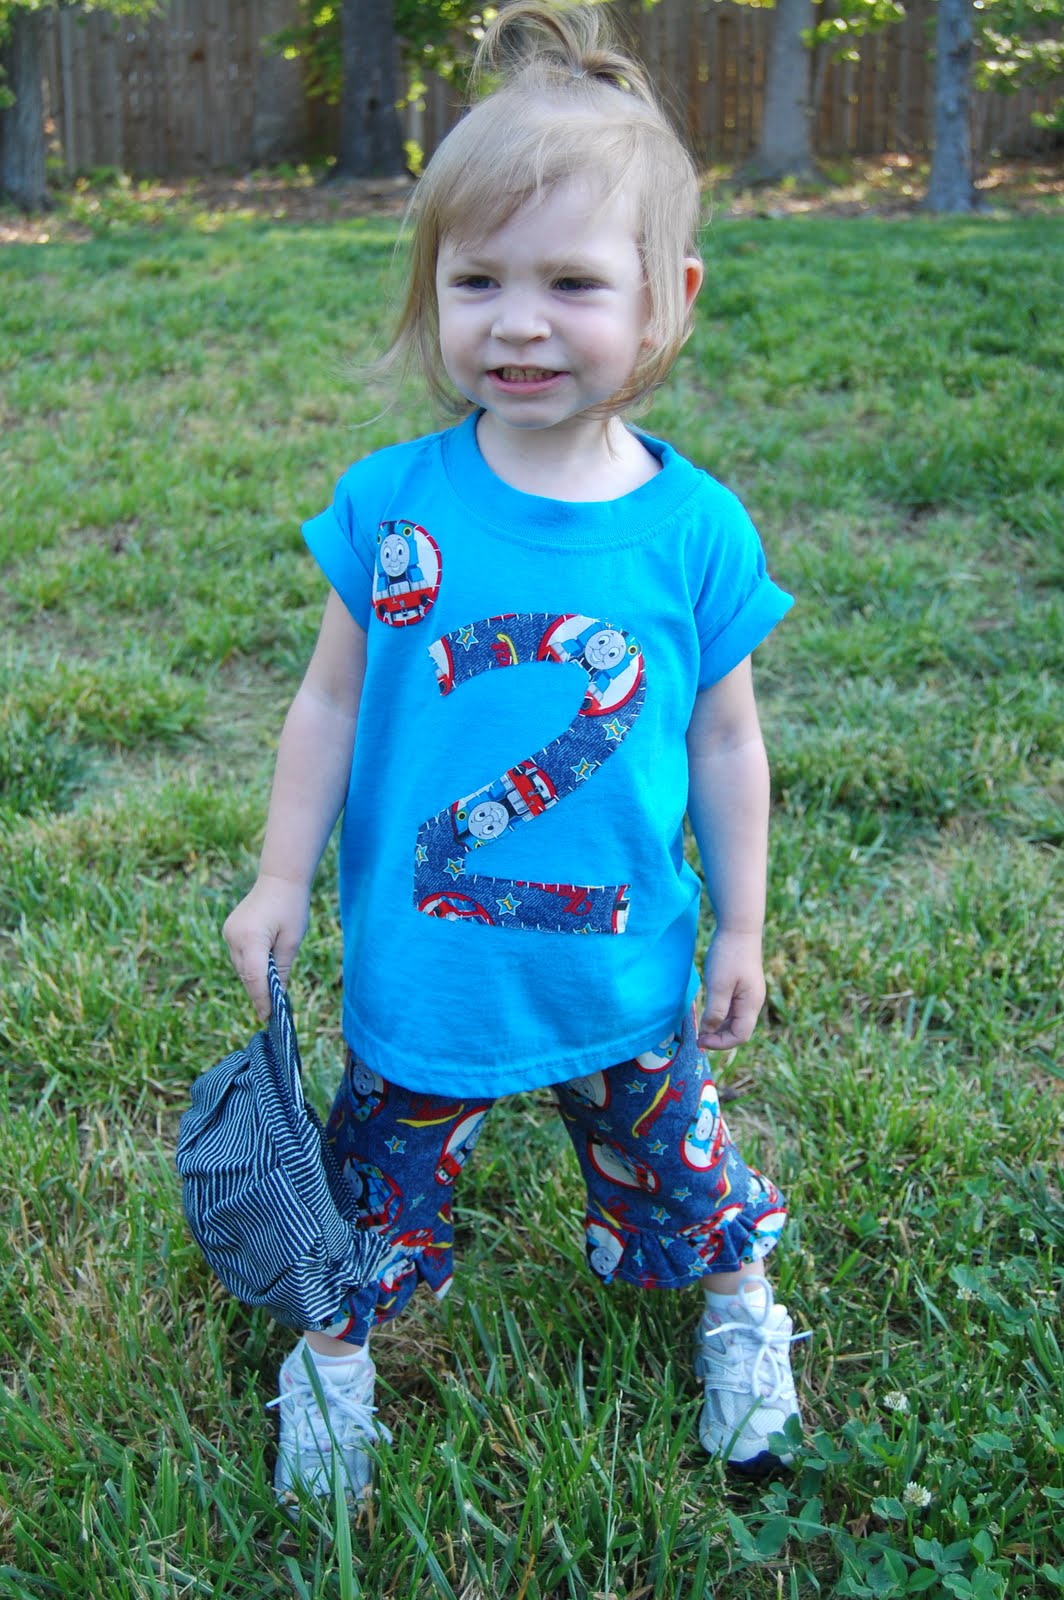
Here's the Birthday Girl herself! I wanted her to have a special Jr. Conductor outfit so I heat-bonded a number two to a t-shirt and hand stitched around the edges. Did the same for the little Thomas badge I cut from the same fabric. For her ruffled pants I used THIS TUTORIAL! I didn't use a pattern, like the instructions, instead I used some of Emma's own pants as a pattern. And I did cropped pants instead of full-length.

Happy Birthday to my Sweet Girl! I love you, Emma!
You can stop growing up now!
So there you have it! Anyone can throw a cheap and semi-homemade Birthday party! I'd love to hear your ideas, too! So please share!!
I'm sharing this as part of Works for Me Wednesdays at We Are That Family
and
Check them out!
Would you help me get to 100 followers??
My goal is to reach that (or more) by May 17th!!
I think we can do it!
I think we can do it!
And to give you a little extra incentive, on that day ALL of my followers will be entered in a really super, Fantabulous Giveway (details later so stay tuned)!! It might include something pretty and kitchen-y :)!!
Blessings,